How to Join PVC Pipe: Step-by-Step Guide for DIY Projects
In recent years, the popularity of PVC pipe has soared, particularly among DIY enthusiasts and home improvement projects. According to the Plastics Pipe Institute, the consumption of PVC pipes in the construction industry has increased by nearly 6% annually, reflecting their versatility and cost-effectiveness. PVC pipes are not only lightweight and easy to work with, but they also boast high resistance to corrosion and chemicals, making them an ideal choice for a variety of applications. Expert John Smith, a leading figure in the plumbing and piping industry, emphasizes, "Properly joining PVC pipe can significantly enhance the durability and longevity of your installations."
Whether you're working on plumbing, irrigation systems, or even crafting unique home projects, understanding how to effectively join PVC pipe is essential for achieving reliable results. This step-by-step guide will equip you with the knowledge and skills necessary to undertake your DIY projects confidently. As the construction sector continues to evolve, mastering the techniques for joining PVC pipe will ensure that you remain at the forefront of efficient and sustainable practices in home improvement. With a myriad of tools and methods available, this guide will demystify the process, making it accessible to everyone, from amateurs to seasoned professionals.
Understanding PVC Pipe and Its Applications
PVC (Polyvinyl Chloride) pipe is a versatile and widely used material in various applications, thanks to its durable properties and resistance to corrosion. With a smooth interior surface, PVC pipes facilitate efficient fluid flow, making them ideal for plumbing, drainage, and irrigation systems. Its lightweight nature makes installation easier, while its resistance to chemicals ensures longevity in both residential and industrial environments.
Beyond plumbing, PVC pipes have found applications in construction, such as in the creation of protective barriers, ventilation systems, and electrical conduits. They are also commonly used in the manufacture of furniture, aquaponics systems, and even DIY crafts, showcasing their adaptability in different projects. Understanding the properties and potential uses of PVC can help DIY enthusiasts effectively incorporate this material into their projects while reaping the benefits of its cost-effectiveness and durability.
PVC Pipe Applications and Usage Statistics
Essential Tools and Materials for Joining PVC Pipes
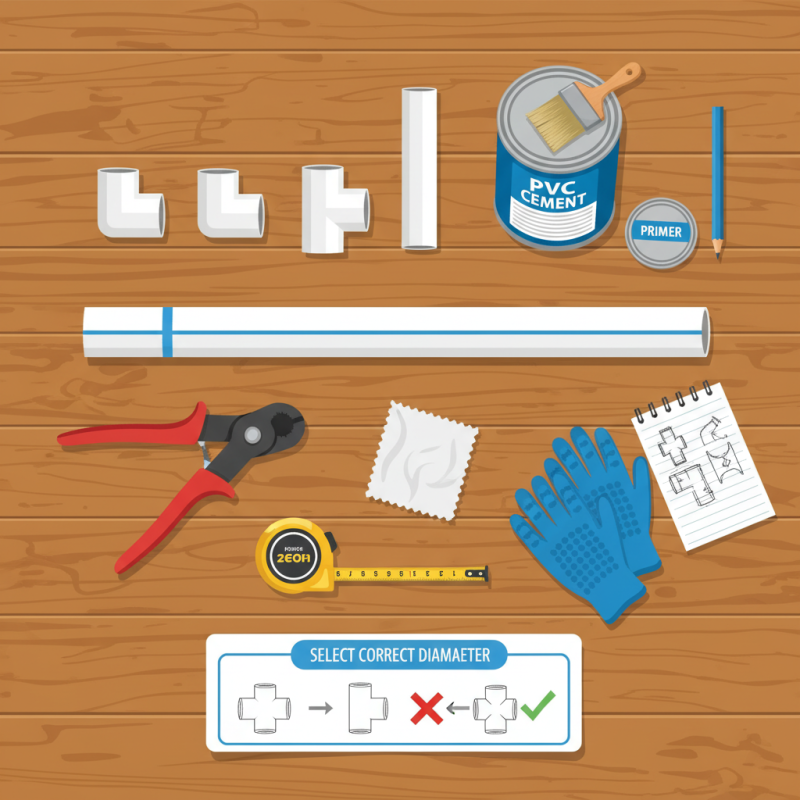
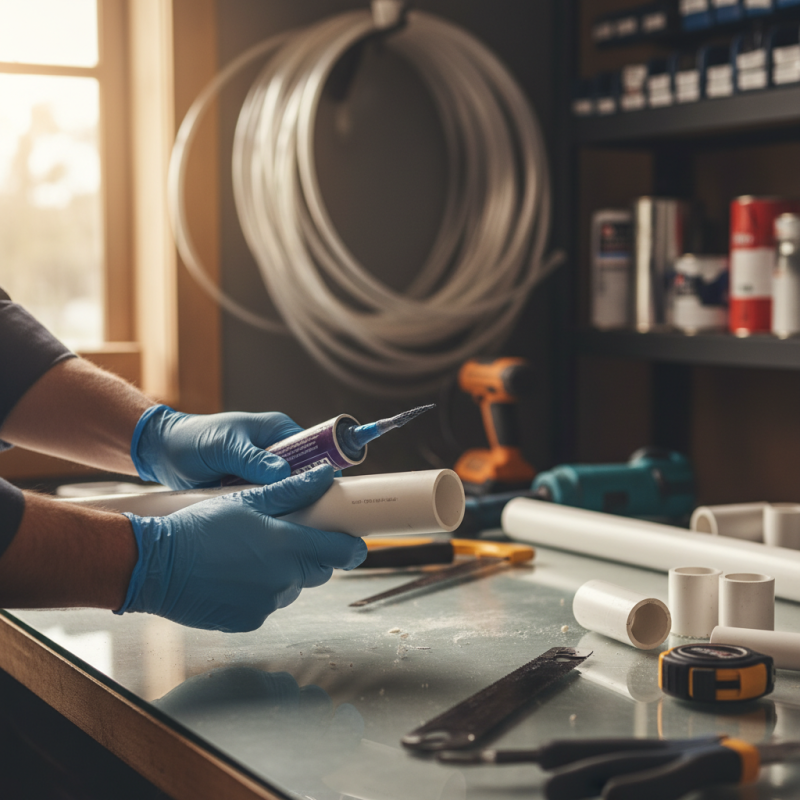
Joining PVC pipes for DIY projects is a straightforward process, but having the right tools and materials is essential for a successful connection. Begin by gathering the primary items needed for this task: PVC pipe, PVC fittings, and PVC cement or adhesive. It's important to select the correct diameter of pipe and fittings to ensure a snug fit, as mismatched sizes can lead to leaks and structural weakness.
In addition to the main materials, you'll also need some basic tools to facilitate the joining process. A pipe cutter or hacksaw will help you make clean, even cuts on the PVC pipes. For better precision during assembly, a measuring tape and a marker are indispensable for marking the desired cutting lengths. Once your pipes are cut and ready, using gloves and safety goggles will protect you during the application of PVC cement, ensuring a safe DIY experience. With these tools and materials at hand, you're ready to tackle your PVC pipe project efficiently and effectively.
Step-by-Step Process for Cutting and Preparing PVC Pipe
When working with PVC pipe for your DIY projects, proper cutting and preparation are critical to ensuring a strong and leak-free connection. Start by gathering your tools. You will need a measuring tape, a marker, a straight edge, and a suitable cutting tool such as a PVC cutter or a saw. First, measure the required length of the PVC pipe carefully, marking the cut line with the marker for precision. Using a straight edge will help maintain a clean and straight line.
Next, cut the pipe along the marked line. If using a PVC cutter, ensure it’s aligned correctly to avoid any damage. For larger diameters, a saw may be more effective, but take care to make smooth, even cuts to prevent jagged edges. After cutting, it's essential to deburr the pipe edges with a utility knife or sandpaper. This process removes any sharp or rough edges that could hinder the fitting process or create leaks. Once deburring is done, your pipe is ready for the next steps in joining, ensuring a secure and reliable connection.
Techniques for Joining PVC Pipes Using Adhesive
Joining PVC pipes is an essential skill for DIY enthusiasts and professionals alike.
Using adhesive is one of the most reliable techniques for ensuring strong, leak-proof joints.
According to industry data, improperly joined pipes account for up to 60% of piping failures, emphasizing the importance of correct procedures.
The first step in this process is to ensure that both the pipe and the fittings are clean and dry.
Use sandpaper or a cleaning solution to remove any dirt or debris that could disrupt the adhesive's integrity.
Once surfaces are prepped, apply a suitable PVC primer followed by a quality adhesive to both the pipe and the fitting.
This process not only enhances the bond but also prepares the materials for a chemically fused joint.
Industry reports indicate that properly glued PVC joints can withstand pressures of up to 280 psi, making them suitable for a variety of water-related applications.
After assembling, hold the pieces together for around 30 seconds and allow adequate curing time as recommended by the adhesive manufacturer, usually around 24 hours before applying pressure or stress on the joint.
Tips for Ensuring a Strong and Durable PVC Joint
When working with PVC pipes, ensuring a strong and durable joint is crucial for the longevity of your project. According to a report from the Plastics Pipe Institute, improperly joined PVC pipes can lead to leaks and failures, affecting not only the integrity of your system but also potentially leading to costly repairs. Consequently, understanding the best practices for joining PVC is essential for any DIY enthusiast or professional.
One of the most critical steps in creating a strong bond is to ensure that the surfaces to be joined are thoroughly cleaned and free of debris, as contaminants can weaken the adhesive's effectiveness. Using a primer before applying the PVC cement is highly recommended, as it not only prepares the surfaces but also enhances adhesion. Data from the American Society for Testing and Materials (ASTM) indicates that joints prepared with primer have a significantly lower failure rate compared to those that do not. Additionally, it is vital to allow the cement to cure adequately, typically 2 to 24 hours depending on the size of the pipe and ambient conditions, to achieve maximum joint strength.
Temperature also plays an important role in the bonding process. The ideal temperature for PVC cement application is between 60°F to 95°F. At temperatures outside this range, the process may be compromised, leading to either insufficient curing or excessive evaporation of solvents in the cement. By adhering to these guidelines, you can significantly improve the durability of your PVC joints, ensuring that your DIY projects withstand the test of time.
How to Join PVC Pipe: Step-by-Step Guide for DIY Projects
| Step |
Action |
Tips |
Estimated Time |
| 1 |
Measure and Cut PVC Pipe |
Use a PVC cutter for clean edges. |
15 minutes |
| 2 |
Clean the Pipe Ends |
Use a cloth and PVC cleaner. |
10 minutes |
| 3 |
Apply PVC Primer |
Ensure even coverage. |
5 minutes |
| 4 |
Apply PVC Cement |
Work quickly before it dries. |
5 minutes |
| 5 |
Join the Pipes |
Twist slightly while pushing together. |
2 minutes |
| 6 |
Hold in Place to Set |
Follow the cement manufacturer's instructions. |
30 minutes |
| 7 |
Test the Joint |
Check for leaks after curing. |
5 minutes |